Tags let you add custom labels to transactions for more detailed tracking and reporting. You can create up to three tag groups, each with its own set of tags.
| Feature | Detail |
|---|---|
| Max tag groups | 3 |
| Multi-select | Optional per group |
| Default tags | Can be set per budget |
| Plan required | Premium and above |
Important: Tags are available on Premium plans and above.
Setting up tag groups
Before you can tag transactions, an admin needs to create tag groups.
- Click Settings in the sidebar, then select Tags.
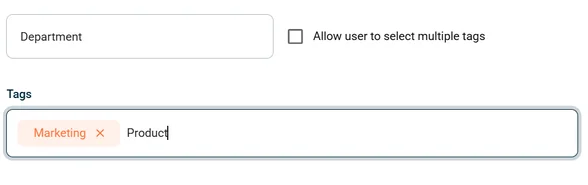
- Enter a group name for each tag group (e.g. “Department”, “Project”, “Location”).
- Add individual tags within each group (e.g. “Marketing”, “Sales”, “Operations”). Press Enter on your keyboard after typing each tag to create it.
- Optionally, tick Allow user to select multiple tags if users should be able to pick more than one tag per group.
- Click Save.
Tagging a transaction
- Click Transactions in the sidebar and open a transaction.
- Navigate to the Edit transaction tab and scroll to the Tags field.
- Choose one or more tags from each available tag group.
- Select Save transaction.
Tip: If a budget has default tags set, those tags are automatically applied to all transactions in that budget. Users can change them if needed.
Common questions
Can I add tags to multiple transactions at once?
Not currently. Tags need to be applied to each transaction individually, or set as default tags on a budget so they apply automatically.
Can regular users create new tags?
No. Only admins can create and manage tag groups in Settings. Users can select from the available tags when editing a transaction.
Do tags sync to Xero?
Yes. Tags can be mapped to Xero tracking categories. See Update tags from Xero for details.