Paying a bill in Budgetly follows four stages: Supplier, Bill, Budget, and Pay.
Tip: You can also email invoices to your Buddy AI address and bills will be created automatically. See How to use Buddy AI.
Getting started
- Click Bills in the sidebar.
- Select the New bill button at the top right.
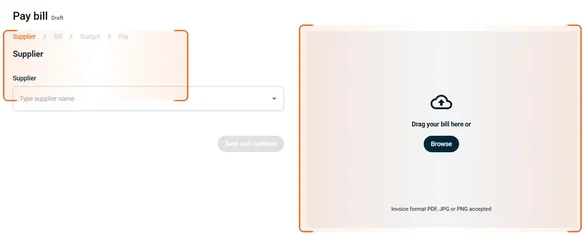
Stage 1 — Supplier
- Choose a Supplier from the dropdown, or click Add new to create one.
- If adding a new supplier, enter the supplier name, ABN, and any other required details.
- Upload an invoice if you have one — drag and drop or click Browse. Budgetly’s AI extracts the details automatically.
Note: If you don’t have an invoice, skip the upload and enter the bill details manually in the next stage.
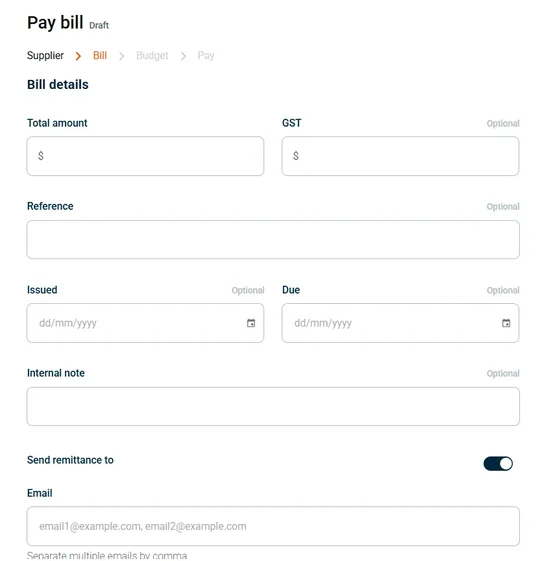
Stage 2 — Bill details
- Enter the Total amount (required).
- Fill in the optional fields as needed:
- GST — the GST component of the bill.
- Reference — an invoice or PO number for your records.
- Issued and Due dates.
- Internal note — visible only to your team.
- Toggle Send remittance to if you want the supplier notified by email when the bill is paid. You can enter multiple email addresses separated by commas.
- Click Save and continue.
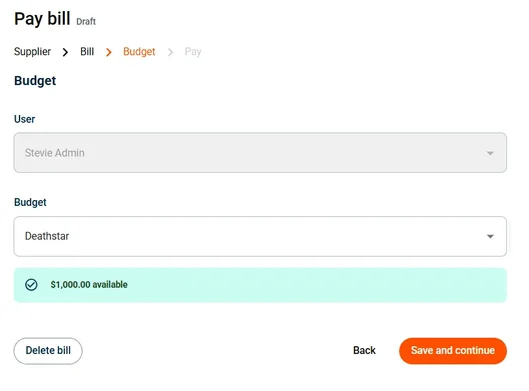
Stage 3 — Budget
- Select the Budget this bill should be paid from.
Note: Once a budget is selected, the available balance is displayed so you can confirm there are sufficient funds.
- Click Save and continue.
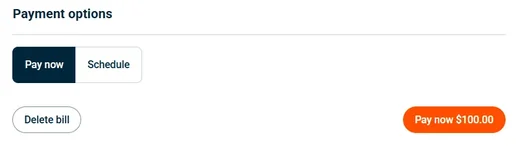
Stage 4 — Pay
Important: Bill payments require sufficient funds in your Spend Account. If your balance is too low, the payment will fail.
- Review the bill summary — supplier, amount, budget, and payment details.
- Choose a payment option:
- Pay now — processes the payment immediately. Click Pay now $[amount] to confirm.
- Schedule — select a future date for the payment. The button changes to Schedule payment.
Payments are sent via bank transfer (BSB) or BPAY, depending on the supplier’s payment details. Set up the payment method when creating the supplier — see How to manage suppliers.
Bill statuses
| Status | What it means |
|---|---|
| Draft | Created but not yet submitted for payment |
| Pending approval | Waiting for admin approval (exceeds auto-approval limit) |
| Approved | Ready to be paid |
| Processing | Payment is being processed |
| Paid | Payment completed |
| Unsuccessful | Payment failed — edit and retry |
Common questions
Can I pay a bill without uploading an invoice?
Yes. Skip the invoice upload in Stage 1 and enter the bill details manually in Stage 2.
Can I schedule a bill payment for a future date?
Yes. In Stage 4, choose Schedule instead of Pay now and select the date.
What happens if my Spend Account balance is too low?
The payment will fail with an Unsuccessful status. Deposit more funds, then edit and retry the bill.