Bills can require admin approval before payment, based on an auto-approval limit you set.
| Bill amount | What happens |
|---|---|
| Under the limit | User can pay directly — no approval needed |
| Over the limit | Bill moves to Pending approval — admin must approve first |
| No limit set | All bills can be paid without approval |
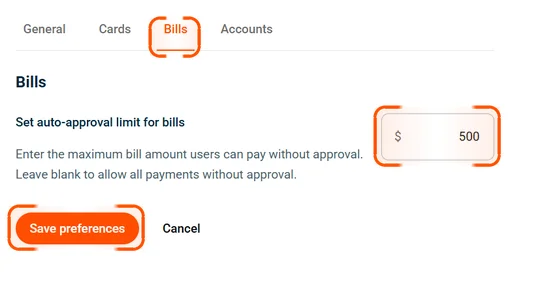
How to set the auto-approval limit
Tip: Leave the field blank to allow all bill payments without approval.
- Click Settings in the sidebar, then select Preferences.
- Open the Bills tab.
- Enter the maximum amount users can pay without approval in the Set auto-approval limit for bills field.
- Select Save preferences.
How approval works
- Bills under the auto-approval limit can be paid directly by the user who created them.
- Bills over the limit move to Pending approval status.
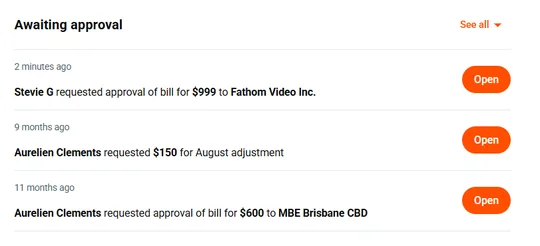
- Pending bills appear in the Awaiting approval section on the admin’s Dashboard.
- An admin must review and approve the bill before payment can proceed.
How to approve a pending bill
- On your Dashboard, find the Awaiting approval section.
- Open the bill requiring approval.
- Review the details — supplier, amount, budget, and category.
- Click Approve to allow payment, or make changes if needed.
Common questions
Can I set different approval limits for different users?
No. The auto-approval limit applies to all users equally. Any bill over the limit requires admin approval.
What if I want all bills to require approval?
Set the auto-approval limit to $0. Every bill will move to Pending approval regardless of amount.
Can a budget owner approve bills?
No. Only admins can approve pending bills from the Awaiting approval section on the Dashboard.